So what do you think? Do you have a particular favourite? I'd love it if you left me a comment.
Thursday 30 July 2015
Three Of The Same....
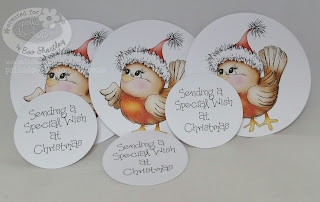
I'm probably quite late to the party regarding crafting & Christmas so I set myself a challenge. I printed off 3 identical sentiments and graphics all from the brilliant new Twiggy & Toots Festive Fun Collection from Polkadoodles and created 3 different cards. All are quite simple but to be honest when you're faced with around 50 or 60 cards to make you need a few quick ones.
So what do you think? Do you have a particular favourite? I'd love it if you left me a comment.
So what do you think? Do you have a particular favourite? I'd love it if you left me a comment.
Saturday 25 July 2015
Another Big 5 Ohhhhhh
I've noticed since turning 50 how all the adverts on Facebook are for prepaid funerals and Saga holidays charming eh? Well yesterday it was my friend Cheryl's turn to join the club. She's been cracking jokes all year about how she's 'only a baby' and its not 'my turn for ages'. Guess what kiddo? your time is now! My head will probably be a little delicate when this post goes live as last night we would have gone and seen Mr Spanky and the hipthrusters...... (I kid you not, that is the name of the band!) that combined with possible red wine may mean today will be a quiteish one.
Here is the card I made for Cheryl, She's a curious sole and likes to try and guess how and why I came across a certain design. This year I have no real idea to be honest. I needed a big 5. 0. of course fowers as she loves her garden and red & white as she likes Arsenal plus the design is a little quirky just like her. So hope you had a lovely day yesterday Cheryl x
Close up view.
Items Used:

Friday 17 July 2015
Two or More Patterned Papers
Here is my DT piece for this week over at the Polkadoodles Challenge Blog. I fancied doing something a bit different I could envisage the idea in my head but had no clue what the technique was called. So I asked my teamies they came up with 'Faux Weaving' or 'Bargello'.
This post will be rather photo heavy but hopefully it will show you how I achieved the effect.

This post will be rather photo heavy but hopefully it will show you how I achieved the effect.
I printed off 3 chosen backing papers from Polkadoodles Paper Boutique 2
then cut them into 3cm strips and stuck them onto another piece of A4 card, alternating the designs as I went.
I then turned the sheet 90 degrees and once again cut into 3cm strips. I then laid them onto another piece of A4 until I was happy with the pattern and then stuck into place. Let it dry and cut into the size I required.
This is my finished piece of 'Faux Weaving' or 'Bargello' backing paper.
I inked the edges and matted onto a piece of contrasting cardstock.
I placed some polkadot ribbon around the centre to break the design up a little and added some faux stitching around the edge.
I printed off one of the templates from the afore mentioned CD. Cut out the circular backing sheet, inked the edges and added a bit of glitter pen to the 'faux stitching', raised it on foam tape and added it to my card.
To complete my card I inked, glittered and put together the gorgeous Rudolph design added some googlie eyes, a sentiment and my card was complete.
Many thanks for stopping by. Please feel free to leave me a comment below x
challenges entered:

Friday 10 July 2015
Embossing.......
I'll be very surprised if I actually have any followers left on my blog as I've been MIA for a few weeks following a family bereavement but you'll be pleased to know I'm now back and ready and raring to go.
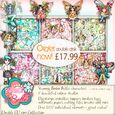
My first project back for the Polkadoodles DT is an inspiration post for the challenge 'Add some embossing'. For my shaped easel card I opted for the oh so versatile Bonbon Belles Collection
Items Used:

Challenges entered:
http://cutecardthursday.blogspot.co.uk/2015/07/challenge-381-ladies-only.html 15/07
http://frillyandfunkie.blogspot.co.uk/2015/07/something-to-say.html 14/07
http://inspirationdestinationchallengeblog.blogspot.co.uk/2015/07/AG-no-41.html 14/07
My first project back for the Polkadoodles DT is an inspiration post for the challenge 'Add some embossing'. For my shaped easel card I opted for the oh so versatile Bonbon Belles Collection
the entire 2 discs are positively rammed with characters, digi stamps, embellishments, toppers, cutting files & papers. It was difficult to decide what to make! I used the button backing paper as my inspiration and went from there.
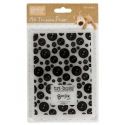
I actually embossed in 2 ways on my card 1, putting some blue card in a button effect embossing folder and inking it up to make it 'pop' and 2, after printing out 3 each of the flower embellishments I used a ball tool to emboss the back of the petals to give them shape and dimension before layering up and placing on my project.To finish off I used 3 buttons on the base as a stopper. Here's a close up shot which hopefully shows up the layers.
Thanks for stopping by. I really appreciate your comments.
Bev x

Challenges entered:
http://cutecardthursday.blogspot.co.uk/2015/07/challenge-381-ladies-only.html 15/07
http://frillyandfunkie.blogspot.co.uk/2015/07/something-to-say.html 14/07
http://inspirationdestinationchallengeblog.blogspot.co.uk/2015/07/AG-no-41.html 14/07
Subscribe to:
Posts (Atom)
